1/35 Scale SJ 891mm Project

Här är tanken att man delar med sig av sina pågående byggprojekt som rör rullande
materiel
rich_eason
Inlägg: 59
Blev medlem: tor 08 okt 2009, 16:08

Re: 1/35 Scale SJ 891mm Project

Inlägg av rich_eason »

As work progressed on the Op project one thing that has been concerning me was the ability to form multiple numbers of identical roller axleboxes and brake shoes from scratch. Searching the very few UK O gauge wagon accessory suppliers it was becoming obvious that no product existed similar in appearance to that on the Op wagon. Looking through the range of Parkside Dundas wagon kits I noticed that their excellent kit of the BR Blue Spot Fish Van was supplied with “similar” axle boxes to those on the Op. Although not identical, a compromise would be made versus the problems associated with producing multiple scratch built items.

An email later and Parkside Dundas confirmed that they could supply the separate mouldings from the kit for both the axle boxes and brake gear for £1 each. Three days later a box arrived with the mouldings.

As soon as I opened the box I was pleased to see that the moulding also included the Parkside method of compensation – much like the prototype of floating axle boxes and these too could be used on the build project.

So an hour of work later the wagon is now sat on its axle boxes and rolling.

Work still needs to be undertaken to ensure that the wagon is level and running true and also requires the brake gear to be fitted. Compensation also requires fitting. Picture of the wagon sat on its axle boxes…

Bild

Bild
Ante S
Inlägg: 193
Blev medlem: ons 30 maj 2007, 15:08

Re: 1/35 Scale SJ 891mm Project

Inlägg av Ante S »

Very nice! The colors for the Op depends largely on what period u choose to build. The Op:s were really rusty and dirty in the 1960s and onwards. The wooden floor was never painted so any colors suitable for unpainted wood will do.

Ante
rich_eason
Inlägg: 59
Blev medlem: tor 08 okt 2009, 16:08

Re: 1/35 Scale SJ 891mm Project

Inlägg av rich_eason »

So its been nearly six months into the project and thought it might be worth while doing a short overview of progress so far.

Initially it may seem like that not much progress has been made with the project, however this never was going to be a 5min project. A significant amount of time has been spent researching the prototypes and whilst it is very easy to quantify what I have researched - 1Gb+ of documents photos etc, however what is not easy to quantify is the information still out there to be found.

So here is a brief retrospective of what work has been done so far...

YO1p
The wooden master and the component parts for the Fibre Glass resin mix have been sourced. What was initially seen as the easy part of this project has turned out to be the hardest. The intention was to use the wooden master of the cab end of the Y01p and cast a plaster cast which could then be used to form a fibre glass shell. However, four attempts later casting the mould is causing a problem, shrinkage and cracking being the main issues. To over come this, the next trial will be to use the wooden former and fibre glass to create a female mould, which can then be used to cast the cab shells.

Opel Blitz
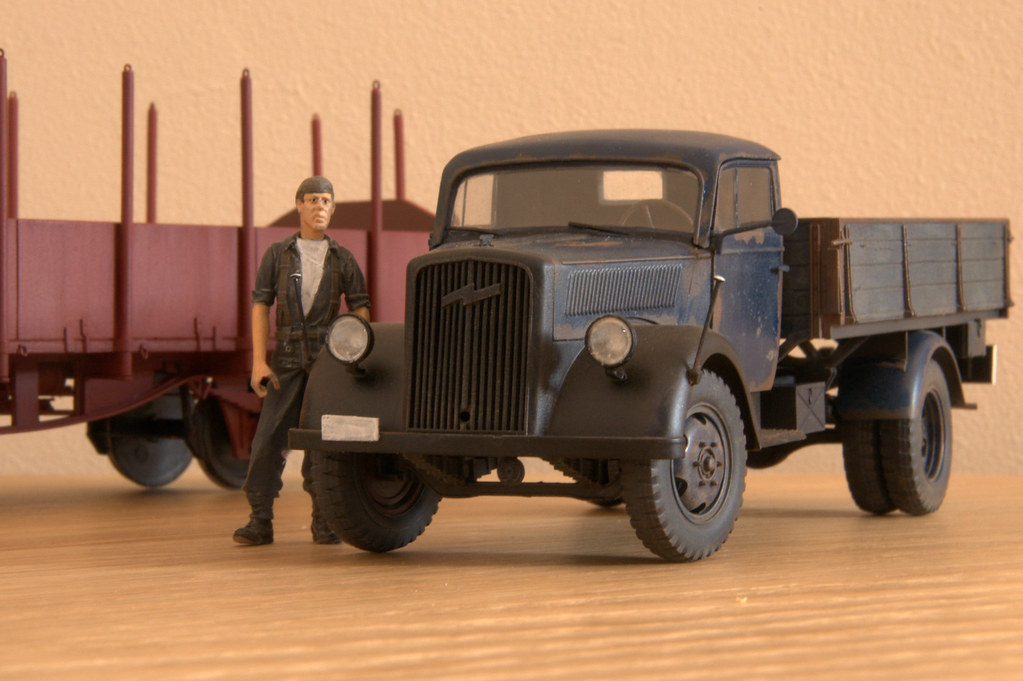
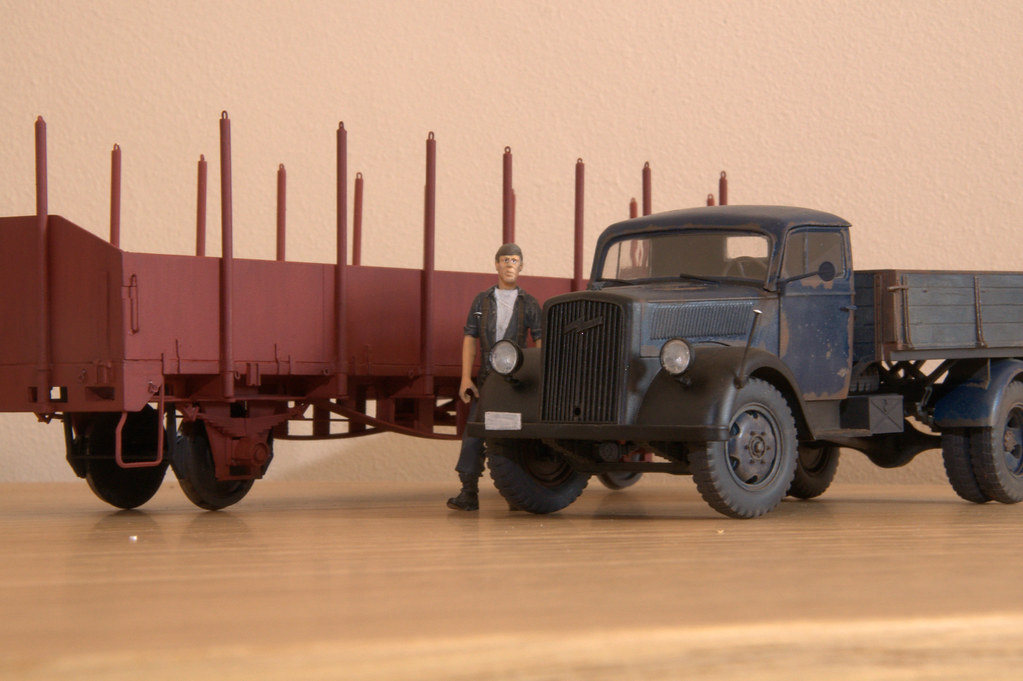
Opel Blitz is complete and just awaiting number plate digits.

Fitter
A 1/35 Verlinden German soldier has been "Railway-cised" to represent a fitters/ Yard hand as seen in the fantastic SJ Information Films - awaiting a tool for his hand... and a job!

Op
The Op project nears completion with the final details of the chains and couplings. I am finding it difficult to source a chain that is prototypical as the modelling chain often has round loops. Once I have found something suitable these will be installed. Meanwhile decals have been drafted and require scaling onto the wagon. Once complete these will be ordered up for a custom decal sheet to be produced.

Bild

Bild

Bild

I have also included this picture of what would be considered its nearest equivalent wagon here on British Rail. Here in 4mm scale the "OBA" was a general merchandise wagon built in the early 1970's. Unfortunately by the time they entered service they had no use and were drafted into service by the Engineering departments. Once in service they were quickly reallocated under the engineers "Z" class and reclassified as "ZAA" and any markings associated with their merchandise use quickly painted over. And as all BR Engineers fleet they were also allocated the traditional fish names and became known as "Bass".

Bild
rich_eason
Inlägg: 59
Blev medlem: tor 08 okt 2009, 16:08

Re: 1/35 Scale SJ 891mm Project

Inlägg av rich_eason »

So some three months since the beginning of the build, the Op wagon is pretty much complete.

Bild

With brake gear, safety loops complete and seen here wearing its first coat of paint (GWR Frame Red) and the wagon awaits decals, weathering and some suitable chain for the side and end stanchions.

And here lies a problem – finding scale chain. Most of the scale chain I have found is far from scale. It also (to me) doesn't look like chain. It is usually consists of rounded links and has a heavy look. Scouring the net I have found a model ship supplier who stocks chain, that looks like chain, however it is too small…

Couplings will be added once a suitable solution has been found.

Meanwhile the custom decals for the Op are complete and scaled and will be included onto a sheet of other white decals for the 1/35 project. Once the sheet is complete the set will be sent for printing.

Bild

With the Op now completed a new wagon build has been started.

Although information and prototype images have been some what illusive, work has started on an SRJ N1 wagon.

Bild

Seen here in early stages of build and sat temporarily on a pair of 3 hole disc wheels, these will be replaced with a set of Slaters S7 open spoked wheels.

Work is required to bring the W irons nearer to the prototype however in dimensions they are thankfully pretty much spot on.
Tobias Ljung
Inlägg: 729
Blev medlem: ons 06 jun 2007, 15:50

Re: 1/35 Scale SJ 891mm Project

Inlägg av Tobias Ljung »

Congratulations to a fine model! Looking at your decals there seems to be another 15 wagons planned - should make up a nice train...

Regarding chains I'd have a look at the Builder's in Scale range. I use their #254 in 1:45, maybe that could fit in 1:35 too?

I'd consider etching the W-irons. This is a standard detail that may be used on plenty of wagons. Maybe it would be a good idea to cast the spring-axel box? I remember some NGIR articles by your country fellow Tom Porteous who successfully casted small series of components in some plastic for his Swedish 600 mm wagons. However in an even bigger scale, if I remember right.

What coupler do you intend to use?

I'm looking forward to see your Gp van completed, I'm sure that will be a gem too.

Good luck,
Tobias
14Kjell Å Granander
Inlägg: 139
Blev medlem: fre 01 jun 2007, 09:05

Re: 1/35 Scale SJ 891mm Project

Inlägg av 14Kjell Å Granander »

Axel boxes by Tom Porteous Now retired ASEA-motor-eng living in China
They were made for 16mm scale (1:19.05) I'm using the same for (15mm) 1:20 just to don't mend the mind to much.
However the box is made as a master mostly of plasticard then a mould is made out of silicon-rubber in a box of wood. The siliconform is then filled with poloyester, the same as for automobile- repairing and boat shells- Not polyester-filler like Plastic Padding.
When hardening this shrinks any percent so it makes it easyer to pull it off the siliconrubberform. This method is most siutabel for small parts. When the parts grove you have to reinforce them whith something hard and stiff like steel wire.Tom made the boogiframes for our Vabis-boogies. I changed the boxes to make a pair for Kosta-model. I made a box with leaf-spring and hooks of both types in silicon,
These forms are siutable to store for long time if you want to make an other wagon later
wbr Kjell Granander
rich_eason
Inlägg: 59
Blev medlem: tor 08 okt 2009, 16:08

Re: 1/35 Scale SJ 891mm Project

Inlägg av rich_eason »

Tobias Ljung skrev: Looking at your decals there seems to be another 15 wagons planned - should make up a nice train...


I'm not sure if I will be able to make 15 wagons...at the rate of one every 3months it would take me nearly 4 years to make them! :D The decal sheet shown above is an extract of a larger sheet being produced for the project. The reason for the many numbers is to simply fill the sheet, but also to provide a range of numbers when I get around to building a second...or a third!
Tobias Ljung skrev: Regarding chains I'd have a look at the Builder's in Scale range. I use their #254 in 1:45, maybe that could fit in 1:35 too?


Thank you I will certainly have a look for them. Many of the items on offer here in the UK are not prototypical to any specific chain type let alone one similar to that found on the Op.
Tobias Ljung skrev: I'd consider etching the W-irons. This is a standard detail that may be used on plenty of wagons. Maybe it would be a good idea to cast the spring-axel box?


Thankfully I do not need to search too far for an etched set of W Irons for the Op and Gp as they are almost identical to a British Rail design and are available for the 7mm/ O Gauge markets. Since the Op build above, and due to the larger 1/35 scale, I have been able to acquire a set and they are a perfect scale match for the W-Irons on the Op/Gp. They also feature full compensation.
Tobias Ljung skrev: What coupler do you intend to use?


At the moment we are looking at two options. One is scratchbuliding as close to the prototype as possible, however they will need to prove reliable in operation as they will be used on an exhibition layout. The second is something similar to these http://www.o14group.org/2009/10/23/rj-m ... ification/ which will be an easy solution but a compromise - not prototypical and slightly under scale. This is an area we are still developing.
Tobias Ljung skrev: I'm looking forward to see your Gp van completed, I'm sure that will be a gem too.


A second Gp is currently in progress to compare with the first which has been made out of 2mm plywood. Which ever turns out "the best" will be the option I go with :)
14Kjell Å Granander skrev: Axel boxes by Tom Porteous Now retired ASEA-motor-eng living in China
They were made for 16mm scale (1:19.05) I'm using the same for (15mm) 1:20 just to don't mend the mind to much.
However the box is made as a master mostly of plasticard then a mould is made out of silicon-rubber in a box of wood. The siliconform is then filled with poloyester, the same as for automobile- repairing and boat shells- Not polyester-filler like Plastic Padding.
When hardening this shrinks any percent so it makes it easyer to pull it off the siliconrubberform. This method is most siutabel for small parts. When the parts grove you have to reinforce them whith something hard and stiff like steel wire.Tom made the boogiframes for our Vabis-boogies. I changed the boxes to make a pairs for Kosta-model. I made a box with feather and hooks of both types in silicon,
These forms are siutable to store for long time if you want to make an other wagon later
wbr Kjell Granander


Thanks, we have already started to explore the possibility of casting small items for the YO1p Railcar. The problem we are having is actually getting hold of the materials to enable us to perform the casting. I was reading in a recent Model Railway Journal about resin casting and the author experienced some significant shrinkage with the final model some weeks after it was removed from the mould. Did you experience any problems?
14Kjell Å Granander
Inlägg: 139
Blev medlem: fre 01 jun 2007, 09:05

Re: 1/35 Scale SJ 891mm Project

Inlägg av 14Kjell Å Granander »

No, the shrinking is not a problem. It's just a percent or so. The method is most siutable to make boggieframesides from or axelboxes complete with leafsprings and shackels. It's perfect
to use epoxy to fit them on and maybe to cast a box 1 by 1. I think it's too weak it can take several days to harden. Polyester gets hard imidiatly of course depending of hardener and accelerator put in. But when it got cold it's ready for use.
Kjell G
14Kjell Å Granander
Inlägg: 139
Blev medlem: fre 01 jun 2007, 09:05

Re: 1/35 Scale SJ 891mm Project

Inlägg av 14Kjell Å Granander »

couplers;
Those Australian couplers will do fine. As you have seen in the SJ-films from the 3'net the coupler often is fitted with a short chain and ball which then is slung over the hook as a locker. You can do the same. Very prototypish indeed.
Kjell Granander
rich_eason
Inlägg: 59
Blev medlem: tor 08 okt 2009, 16:08

Re: 1/35 Scale SJ 891mm Project

Inlägg av rich_eason »

This has been a long time coming.

After constructing the body for the Gp, work went on hold. Firstly I wanted to make sure that the ply wood body remained stable and secondly, I wasn't sure if the grained texture from the wood was too coarse. Meanwhile work progressed on the Op and now that it is near completion, I have focused my attention back onto the Gp.

Seen here sat on its new formed under frame and wheel set for the photo, work has started on trying to get the van finished before its first exhibition in Sept. There is still loads of work to get this finished however its now a rolling chassis and awaits a general tidy up before any primer is sprayed.

Bild

Meanwhile I was feeling the need to do some painting and thus set about weathering a Tamiya Barrel kit I'd managed to pick up going cheap. Not content with the moulded dented barrel, I thought that it needed a bit more abuse and set about creating some rust holes. I'd like to think that this one being stuck round the corner of a shed or yard in amongst the undergrowth forgotten about and clearly lacking any content.

Bild

By scraping through the plastic with a scalpel until the plastic is thin to the point its translucent, a gentle poke with the blade from the rear created the pushed out rusted panel look.

Once the damage had been done, assembly is completed in a matter of minutes and a coat of red oxide primer was used to start of the painting process.

Once dry, a mix of brown and reds were mixed randomly on a pallet and stippled into place to create the base rusty colour surface texture. A very light dry brush of Gun Metal Humbrol Metalcote provides a very gentle metallic sheen.

Once dry, Maskol was applied using a dead paintbrush and stippled all over. Again, once dry the top coat paint (Halfords Ford Red) was applied. Once this had dried "tacky" I attacked the paint with parcel tape and used this vigorously remove any Maskol and pull off any remaining wet paint.

Once all dried, a gentle wash of MIG Rust mix and MIG Light Rust powder over small areas to finish. I think a light coat of Europe Dust is required once located to blend into its surroundings.

Total about 2hrs work tops.
Skriv svar